
Tips for a DIY beginner: Which sander should I buy?
We’re on our third house renovation but I’d definitely still call myself a beginner when it comes to DIY. It doesn’t come naturally to me, and whilst I do it a lot, I still find it intimidating and often overwhelming. No question is too silly, so do let me know if there’s any other DIY questions you’d like covered.
One of the questions I get asked most on Instagram is which electric sander do I recommend for someone starting out?
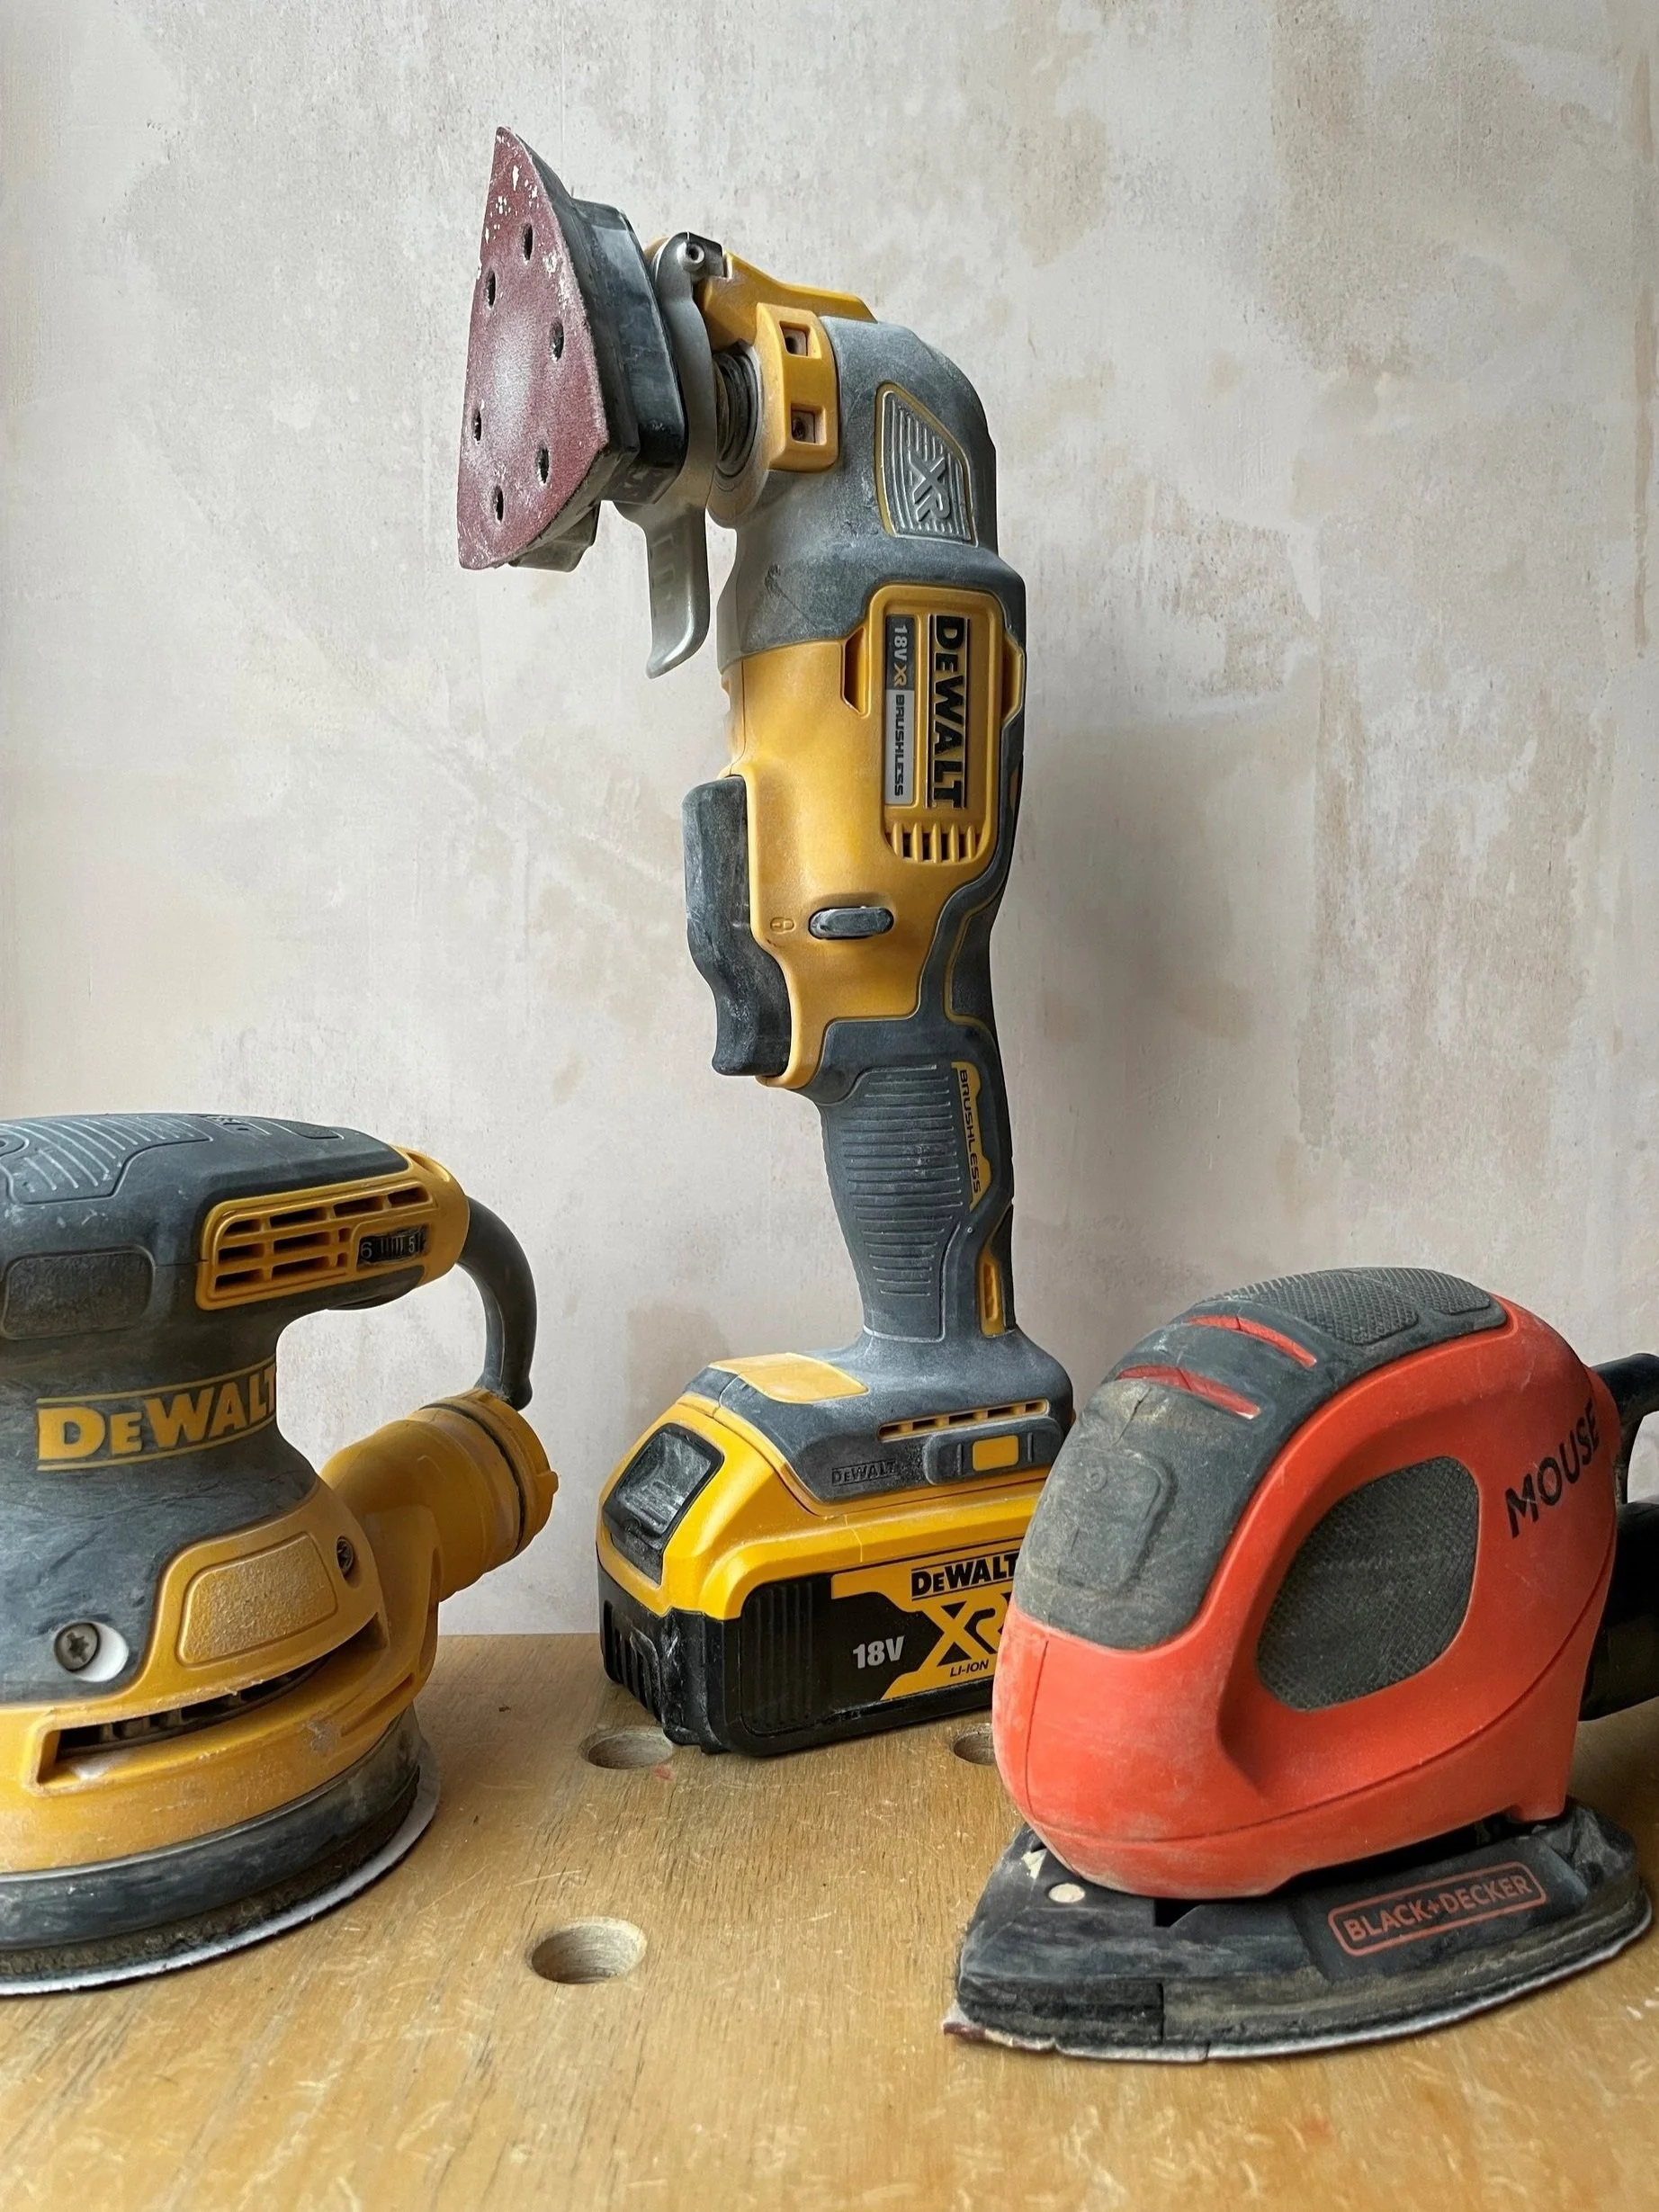
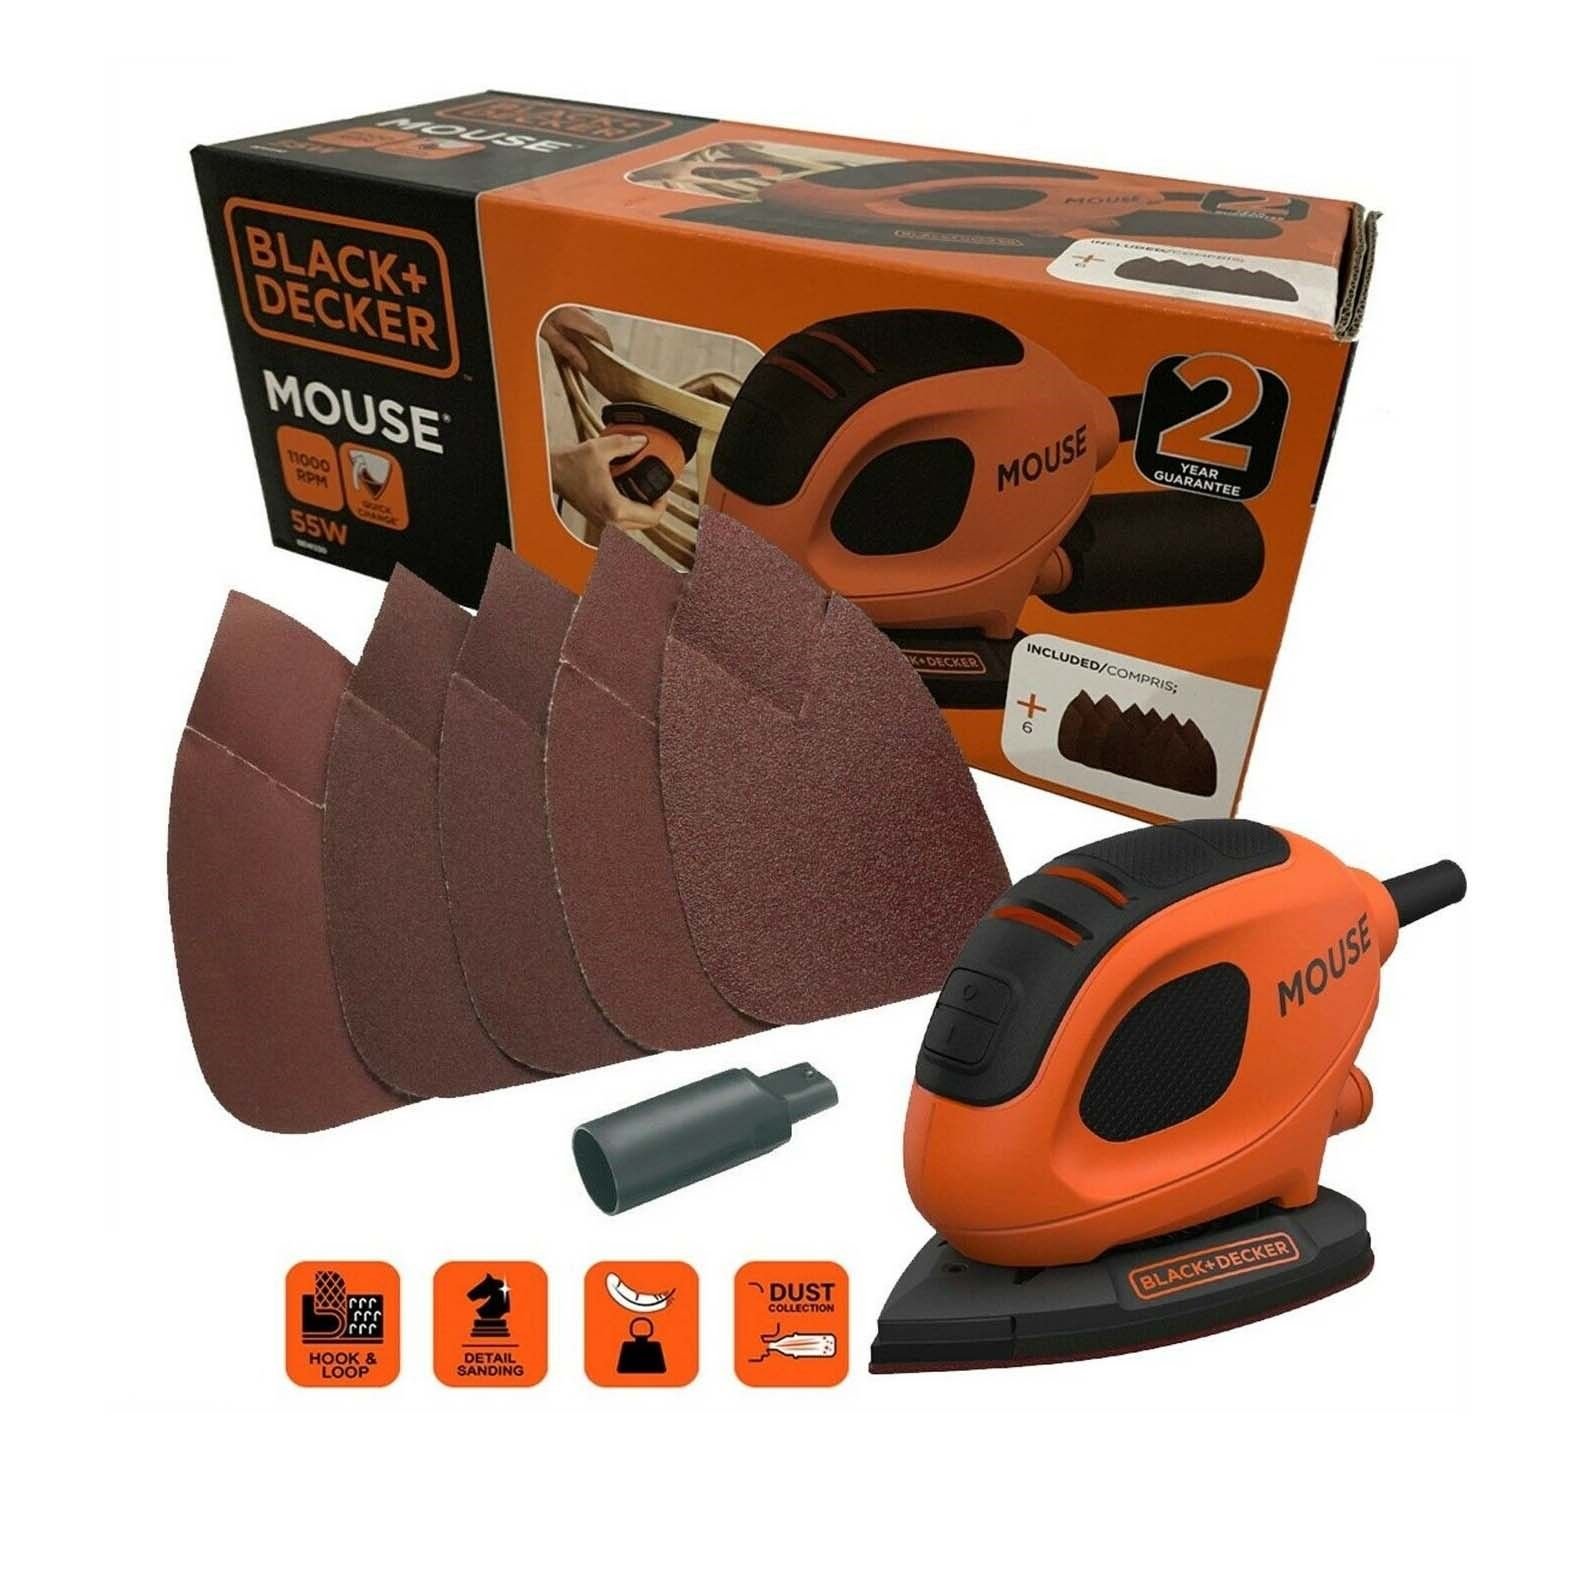
Black and Decker 55w Mouse Detail Sander 240V
This is a great beginner tool. It’s sold at a low price point so perfect if you don’t want to invest in anything too soon. I love the triangular shape which is really useful when sanding back furniture or anything fiddly with lots of corners.
Its design is based on a computer mouse, and it is by far the most comfortable to use (of the three listed here) as it is very light and easy to hold.
However, it is also very loud and definitely the least powerful of the three. If you have small projects in mind like sanding shelves or prepping furniture before painting it will be ok, but if you wanted to take something larger right back to wood, you may have a long job ahead of you with this sander as it takes a while to sand through the layers.
Having said that, it was the only sander we used for renovation number one and two so it really is a versatile bit of kit. I just think now I’ve used more powerful sanders, I get impatient with the strength of it! I don’t use mine much anymore, except for when I am sanding something more delicate like window frames, a small metal handle or something I don’t want to damage with an accidental slip of the sander.

Dewalt 125mm Random Orbital Sander 240V
This is much more powerful than the Black and Decker Mouse and hence my preferred sander of choice. It still isn’t as powerful as other, more expensive, sanders on the market but for under £100, it does a very good job and is perfect for an amateur DIYer like myself.
It is quite a bit heavier than the mouse sander, and I do find it can be hard work physically, especially when sanding a ceiling or anything up high for long periods of time. I went for the plug-in option, but having used my brother-in-laws sander which is the same model but battery charged, I think I would definitely go for the cordless battery option next time, as it is a lot lighter and easier to use. I attach this sander to our Henry hoover (which helps extract the dust and limits the mess) and the cables from the hoover and the sander and the extension lead are forever getting tangled much to my frustration!
On the whole though, this is a fantastic all rounder. I’ve used it for upcycling multiple bits of furniture, sanding walls, the summerhouse and large mdf cupboard doors. It’s worth noting though, that this has a round sanding head, so it is impossible to completely reach any corners with it. Because the disks rotates pretty fast too, you do need relatively good control otherwise you could make an unwanted dent in a piece of wood with a quick slip of the hand.

DeWalt 18V XR Multi Tool Cordless
The multi-tool comes with a range of blades that can be used for different tasks. The blades/sanding pads are super simple and quick to change, it’s very easy to use, light and easy to hold, battery powered with a great battery life and I find the LED torch a really handy feature.
As for sanding, it has a small triangular head which is perfect for getting into really tricky areas you can’t reach with the DeWalt Orbital or even the Black and Decker Mouse. Obviously you wouldn’t want to use it solely to sand a large area, but it was perfect for when I upcycled our peg rail shelf or for sanding around the pipes on our kitchen work top. I absolutely hate hand sanding anything so I find this so useful!
Summary:
Hopefully that helps give you more of an idea about each sander I am familiar with, and depending on the tasks you have in mind and your budget, you can choose accordingly.
Obviously, there are other sanders out there which I haven’t used, so I can’t compare, but I would wholly recommend the three above as you really get your money’s worth.
It’s also important to remember to use the sandpapers correctly, from getting the right size (you don’t have to buy the specific branded paper but do ensure your generic one fits correctly!) to using the appropriate grit number. I generally use 40, 60, 80, 120 and 240 grits depending on the job.
If you are restoring furniture for example, you may need to start at 40 (the coarsest of papers) and work your way gradually up to 240 which will result in a lovely smooth finish. If you are just creating a key to repaint something, then a single sand with 120 would be fine. As you become more familiar with sanding, you will start to learn which grit to use for what, and, at first, its just a simple case of trial and error, so nothing to be intimidated about!
Unfortunately sanding sheets wear through surprisingly quickly, so do ensure you are replacing them fairly frequently otherwise you’ll find your sanding to be ineffective. If sanding for long periods of time, do make sure you wear protective gear like ear defenders (they are so loud!) and glasses and a mask. Try and sand outside when you can or in a well ventilated area.
I would also advise finding adapters to attach your sander to your hoover. We have a Henry hoover, which is a fairly common hoover of choice for renovators, so there are a lot of options online (I found ours on eBay) for attachments that connect the sander to the hoover. This makes a huge difference to the dust and mess involved! Just search the brand of your sander, the brand of your hoover and words like ‘extraction attachment’ and hopefully something will come up.
Related blog posts:
You can also follow me on: